
There’s something magical about a well-made latte or cappuccino—the silky texture, the microfoam, the way it blends with espresso into a comforting cup. But if you think you need an expensive espresso machine to achieve that creamy, frothy goodness at home, think again.
Whether you’re working with basic kitchen tools or just a microwave and some determination, you can froth milk at home without a machine. In fact, with the right technique and a little patience, you can get surprisingly close to barista-style foam. Here’s everything you need to know, plus a few clever hacks you probably haven’t tried yet.
Why Froth Milk in the First Place?
Before we dive into the how-to, let’s quickly cover the why. Frothing milk does more than just make your drink look fancy. It changes the texture, sweetness, and overall experience of your coffee.
When you froth milk, you’re introducing air and breaking down fat molecules, which makes the milk smoother and naturally sweeter. That’s why a latte or flat white can taste richer and more indulgent, even without adding sugar.
Frothed milk is essential for:
- Lattes
- Cappuccinos
- Flat whites
- Macchiatos
- Iced drinks like frappes or iced lattes (yes, cold foam is a thing!)
Now let’s look at how to create it—no fancy espresso machine required.
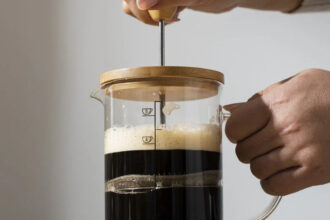
1. Frothing Milk with a French Press

If you already own a French press, you’re halfway there. While it’s famous for brewing bold coffee, a French press also makes an excellent DIY milk frother.
How to do it:
- Heat your milk (dairy or non-dairy) to around 60–65°C (140–150°F)—steaming, but not boiling.
- Pour the hot milk into the French press.
- Pump the plunger up and down rapidly for 15–30 seconds. You’ll see the milk expand and thicken.
- Let it rest for a few seconds, then tap the base to pop large bubbles.
Pro tip: Don’t overfill—stick to about ⅓ full to leave room for foam expansion.
This method creates nice microfoam, especially with whole milk or oat milk. It’s great for making creamy lattes and cappuccinos.
2. Frothing Milk in a Jar
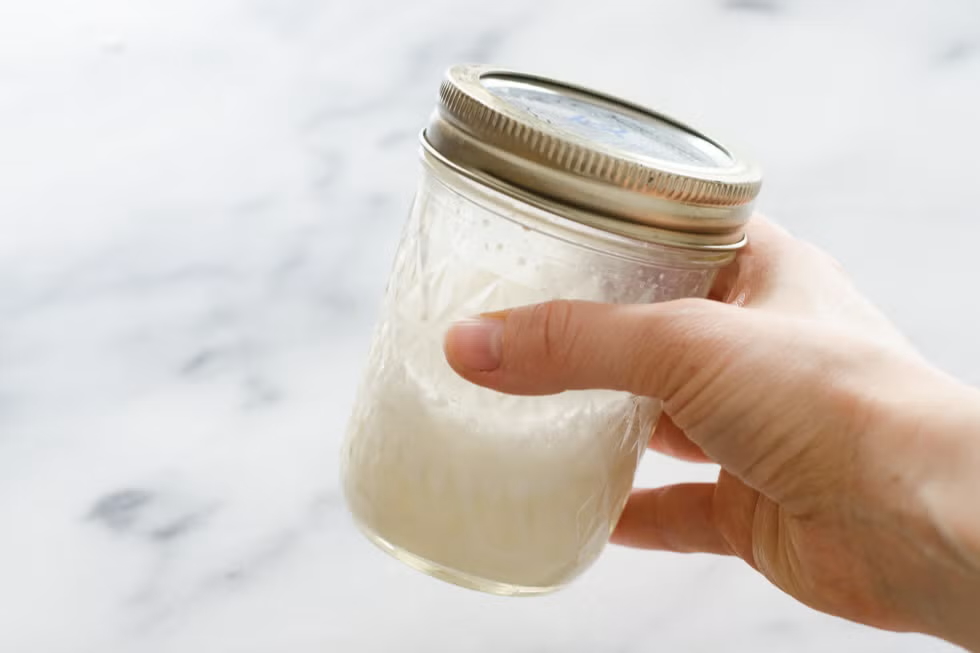
No special tools? No problem. This is the most accessible way to froth milk, and it works surprisingly well in a pinch.
How to do it:
- Pour warm milk into a clean jar, filling no more than halfway.
- Screw the lid on tightly.
- Shake vigorously for 30–60 seconds until the milk doubles in volume and looks foamy.
- Let it settle slightly before pouring into your coffee.
It won’t give you microfoam, but you’ll still get a nice airy froth for topping drinks.
Note: Make sure the jar can handle heat, and wrap it in a towel if it gets too hot to hold.
3. Frothing Milk with a Whisk
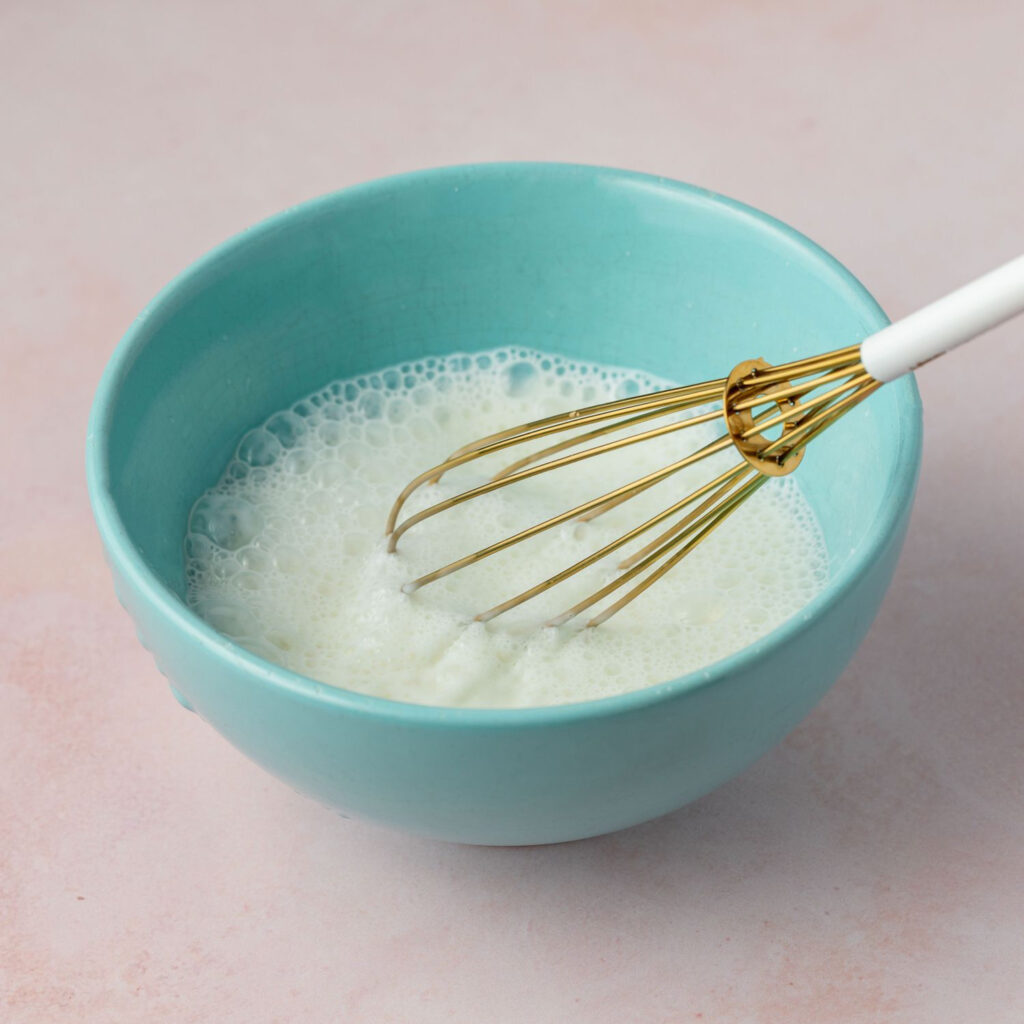
Got a whisk? Then you’ve got yourself a manual frother. It takes a little elbow grease, but it gets the job done.
How to do it:
- Heat your milk gently in a saucepan. Once hot, remove from heat and start whisking quickly by hand.
- Use a back-and-forth motion (not circular) for better foam creation.
- Whisk for about 30 seconds, or until the milk starts looking fluffy and airy.
You can also use a balloon whisk for better results, especially if you’re using non-dairy milk.
Bonus: This method gives you good control over texture and is easy to clean up.
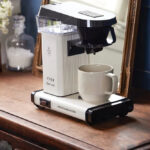
4. Frothing Milk with a Handheld Frother
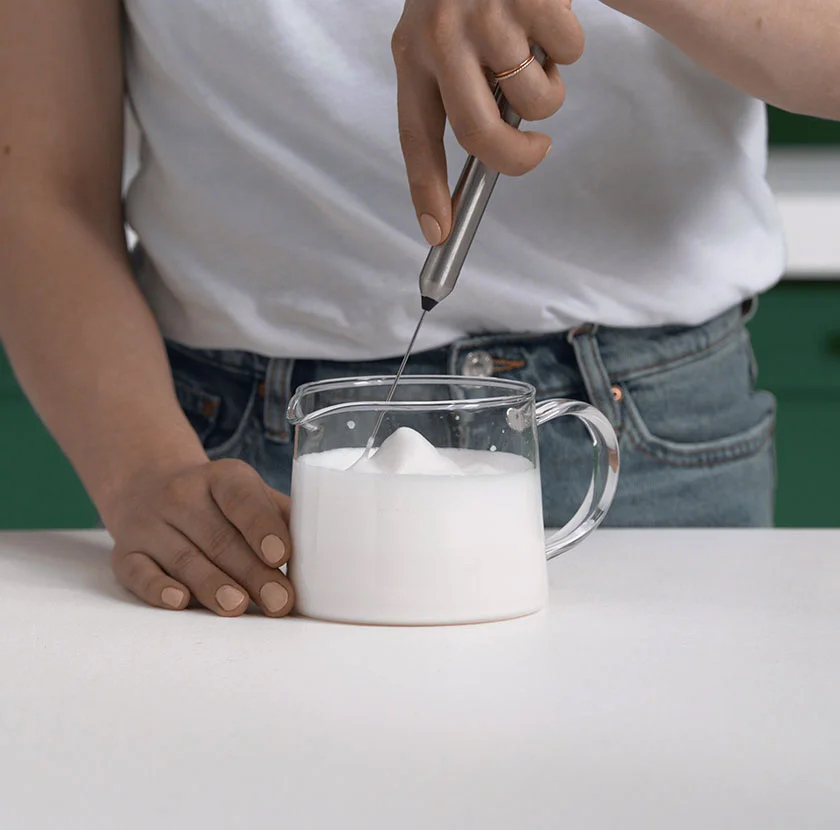
Okay, this one isn’t completely machine-free—but handheld electric milk frothers are so affordable and compact, they deserve a mention.
These battery-operated wands spin at high speed and create rich, airy foam in seconds. They’re perfect if you want a quick froth without investing in a full espresso machine.
How to do it:
- Heat your milk first.
- Submerge the frother wand into the milk and turn it on.
- Move the wand up and down gently to create foam.
- Froth for 15–30 seconds until it reaches your desired texture.
These are great for all milk types, including almond, oat, and soy.
5. Blender or Immersion Blender Method
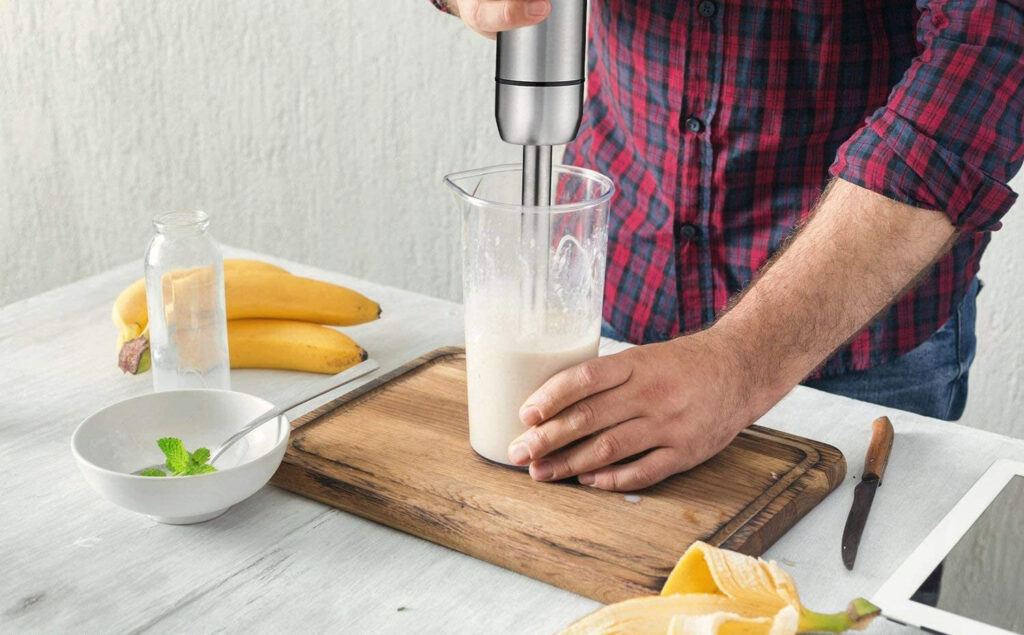
If you don’t mind washing a few more dishes, using a blender or immersion blender can give you a lot of froth fast.
How to do it:
- Heat your milk.
- Pour into a blender (or leave in the saucepan if using an immersion blender).
- Blend on high for 15–30 seconds until foamy.
- Let the foam settle for a few seconds before pouring.
This method is excellent for batch frothing—great if you’re making multiple drinks.
Which Milk Froths Best?
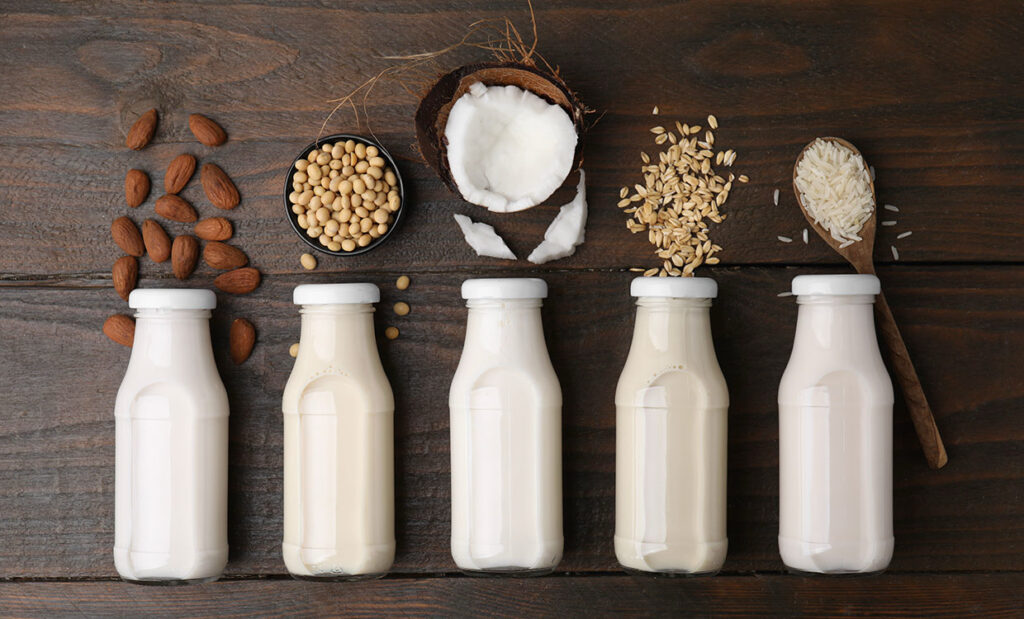
The type of milk you use will affect the results. Whole milk is the gold standard for creating creamy, dense foam. But don’t worry—non-dairy options work too!
- Whole milk: Best texture and sweetness, classic microfoam.
- Oat milk: Creamy and stable, barista versions froth beautifully.
- Almond milk: Can work, but results vary by brand.
- Soy milk: Froths decently with some separation.
- Coconut milk: Tasty, but doesn’t foam much.
Look for “barista editions” if you’re using plant-based milks. These are formulated to steam and froth well.
Tips for Better DIY Milk Froth
- Heat milk gently: Never boil—it changes the taste and texture. Aim for 60–65°C (or until it’s warm but not scalding).
- Use fresh milk: The fresher the milk, the better the froth.
- Tap and swirl: After frothing, tap the container on your counter and swirl to break up large bubbles.
- Use immediately: Froth doesn’t last long. Pour or spoon it into your drink while it’s fresh.
Final Thoughts: You Don’t Need Fancy Gear to Froth Like a Pro
Frothing milk at home doesn’t require a café setup or a hefty budget. With a few clever hacks and everyday kitchen tools, you can create coffee shop-style foam in your pajamas—no barista training needed.
Whether you’re shaking a jar, plunging a French press, or using a whisk with your morning playlist on, there’s something satisfying about creating your own café-style drink from scratch. Once you’ve got your frothing down, pair it with your favourite brew method (like French press or AeroPress) and enjoy the full homemade experience.


One Comment